How to Install Veneer Wall Panels for Your Home Decor?
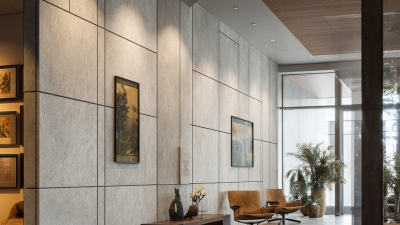
Installing Veneer Wall Panels can transform your home’s decor. Mark Johnson, a leading expert in home design, states, “Veneer Wall Panels elevate spaces through their unique textures and finishes.” This statement highlights the aesthetic value these panels can add.
Veneer Wall Panels offer a distinct look to any room. They come in various materials and styles, catering to different tastes and preferences. Choosing the right panel can be overwhelming. The thickness, grain pattern, and color play crucial roles in achieving the desired ambiance.
However, the installation process can pose challenges. Proper preparation is critical to avoid mistakes. Ensuring the wall is smooth and clean is essential. It is easy to overlook these details, yet they significantly impact the final result. Reflecting on the installation journey can lead to better outcomes in future projects.
Understanding Veneer Wall Panels: Types and Benefits
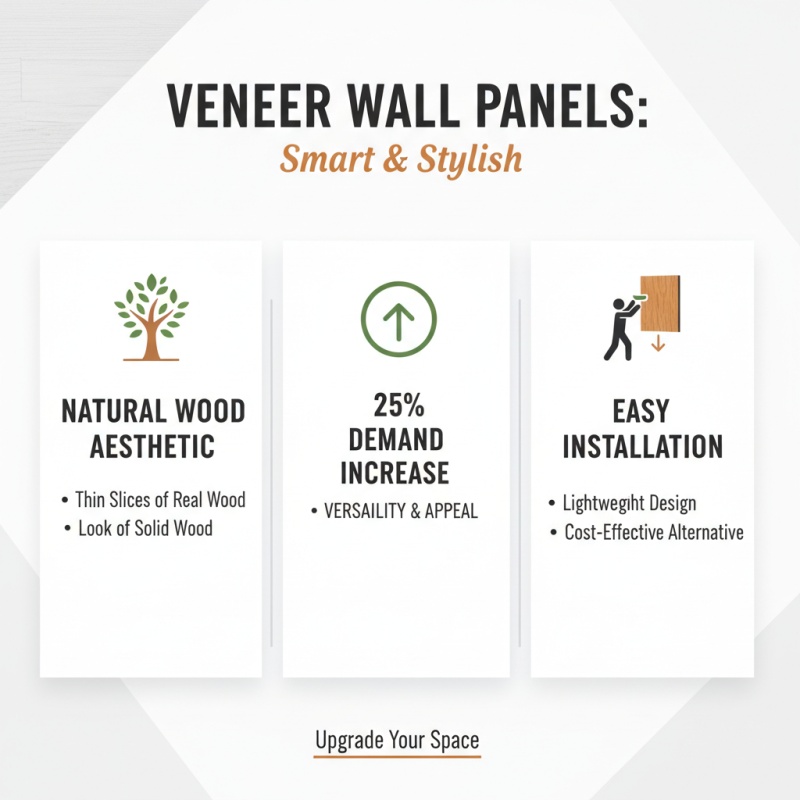
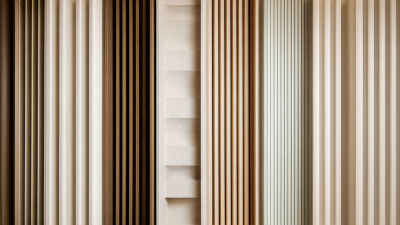
Veneer wall panels have gained popularity for their versatility and aesthetic appeal. These panels are typically made from thin slices of natural wood. They offer the look of solid wood at a fraction of the cost. According to industry reports, the demand for veneer products increased by 25% last year alone. Their lightweight design makes them easy to handle and install.
Understanding the different types of veneer wall panels is essential for any homeowner. There are various finishes available, such as oak, cherry, or maple. Each type imparts a unique character to the space. According to a recent study, 70% of homeowners prefer natural wood finishes for their warmth and texture. However, improper installation can lead to issues. While the process seems straightforward, achieving a seamless look requires precision. Gaps or misalignments can detract from the overall aesthetic.
The benefits extend beyond aesthetics. Veneer panels provide sound insulation and are eco-friendly. They are made from sustainably sourced materials, aligning with the growing trend of green building. However, some critics argue that veneers can be less durable than solid wood. Careful consideration is necessary when choosing the right product. In conclusion, while veneer wall panels present exciting possibilities, a thoughtful approach is crucial for maximizing their impact in your home.
Preparing Your Space: Tools and Materials Needed for Installation
Installing veneer wall panels can dramatically enhance your home decor. However, preparation is key. To get started, you’ll need some essential tools. A carpenter’s level ensures your panels align perfectly. A utility knife and a straight edge allow for precise cuts. Don’t forget a measuring tape and adhesive. In addition, safety goggles are critical to protect your eyes during installation.
Gathering materials is equally important. Depending on the design, veneer panels can vary in size and thickness. Data from the U.S. Census Bureau highlights that nearly 60% of homeowners opt for natural wood veneers for their aesthetics. This emphasis on natural appearance should guide your selection. Consider the environment where you'll install your panels. Moisture-prone areas may require additional materials, like a moisture barrier.
Tips: Always calculate your dimensions twice before cutting. This saves time and reduces waste. It’s wise to order a little extra material as mistakes can happen. Sometimes, errors in installation can stem from measurements taken in haste or from incorrect assumptions about wall surfaces. Slow down. Ensure your wall is clean and free from any old paint or wallpaper to achieve the best results.
Step-by-Step Guide: How to Measure and Cut Veneer Panels
Measuring and cutting veneer panels can seem daunting, but it’s a manageable project. Start by gathering your tools: a measuring tape, a utility knife, and a straight edge. Measure the surface area where you plan to install the panels. Be precise; even small errors can lead to noticeable gaps. Write down your measurements clearly to avoid confusion later.
Cutting the veneer panels requires patience. Lay the panel flat on a stable surface. Align your straight edge with the measurement marks. Use the utility knife to score the veneer gently. Apply firm pressure, but don’t cut all the way through on your first pass. It might take several passes to cut through entirely. If you notice any splintering, consider using a backing board to protect the veneer.
Remember that every cut may not be perfect. It’s okay to have minor imperfections. Sand the edges lightly to smooth them out. Reflect on your technique as you work; it’s part of the learning process. Each panel you cut will improve your skills for the next one. Don’t rush; enjoy the craftsmanship involved in your home decor project.
Installation Techniques: Adhering Panels to the Wall
Installing veneer wall panels can dramatically enhance your home decor. The key to a successful installation is proper adhesion. Start by preparing the wall surface. Clean it thoroughly. Remove any dust or debris. If your walls are uneven, consider applying a leveling compound. This step can help ensure a smooth finish.
When applying the adhesive, use a notched trowel for even distribution. Apply the adhesive in sections to prevent it from drying out. Press the veneer panels firmly against the wall. Ensure there are no air bubbles trapped underneath. It might take some time to get this right. Don't rush; take your time to adjust the panels as needed.
Tips: Always do a dry fit first to see how the panels align. Measure twice, cut once. If you make a mistake, don't panic. A little adhesive can fix minor misalignments. After installing, allow the adhesive to cure fully before adding any decorative touches. The result will be worth the effort, giving your space a refined look.
Veneer Wall Panels Installation Techniques
Finishing Touches: Sealing and Maintenance of Veneer Panels
Sealing veneer wall panels is a crucial step in preserving their beauty. Use a clear sealant to protect against moisture and wear. This helps to maintain the finish and prevents damage over time. Apply the sealant evenly with a brush or roller. Pay attention to corners and edges, as they tend to absorb moisture more easily. Let the first coat dry completely before adding another layer.
Maintenance is equally important. Regularly dust the veneer panels to keep them looking fresh. Avoid using abrasive cleaners, as they can scratch the surface. Instead, opt for a soft cloth dampened with mild detergent. It's worth noting that sunlight can fade colors, so consider using window treatments to minimize exposure. Remember, these panels need care just like any other décor item. They may not be perfect and could show signs of wear, but with some effort, they can last for years.
How to Install Veneer Wall Panels for Your Home Decor? - Finishing Touches: Sealing and Maintenance of Veneer Panels
| Step |
Description |
Materials Needed |
Tips |
| 1 |
Prepare the wall surface by cleaning and ensuring it is dry. |
Cleaning agents, sandpaper |
Use a level to ensure the wall is straight. |
| 2 |
Measure and cut the veneer panels to fit the wall size. |
Measuring tape, utility knife |
Double-check measurements before cutting. |
| 3 |
Apply adhesive on the back of veneer panels. |
Panel adhesive or construction glue |
Use a notched trowel for even application. |
| 4 |
Press the panels onto the wall firmly. |
None |
Use spacers to maintain even gaps. |
| 5 |
Seal the veneer panels for protection. |
Veneer sealant or varnish |
Apply in thin layers and let dry completely. |
| 6 |
Regular maintenance and cleaning of the panels. |
Soft cloth, mild cleaning solution |
Avoid abrasive cleaners. |
 Hot Selling